SharePoint Tip: Use this Script to Archive Your Way to Greater Performance
A common problem with SharePoint, regardless of version, is that once a list or library has more than 2000 items in it, performance is impacted. Once you reach 5000 items, the impact becomes severe. The issue lies with a fundamental part of the interaction between SQL and SharePoint and, because of that, it is not easily solved.
While the usual solution is to leverage views to minimize the impact on any one user, we’re going to look at using a PowerShell script to clean up older items and move them to an archive. Our scenario is this: You have a list you made last year for sales contacts; but you’re well over 2000 items now and want to move the 2018 entries to an “archive” list. Ideally, you want a process you can easily leverage and you don’t want to use the document management feature for a variety of reasons that we’ll leave out for now.
If you’re looking at the above scenario, you’re looking for a PowerShell script solution for a reason and we have it. This script could be leveraged once a year, every year, to clear out the prior year’s list contents to an “Archive.” This archive list presumably won’t grow as each successive year would be its own list. The data remains in SharePoint and is easily leveraged, but you’re not crowding and slowing the most current entries.
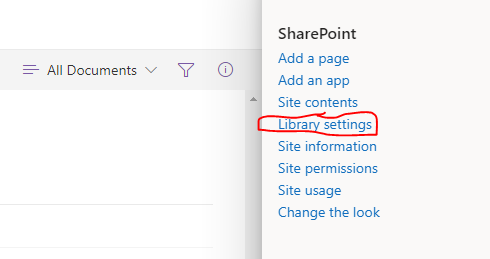
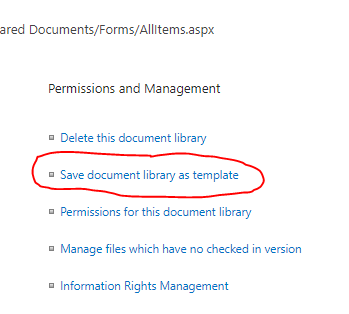
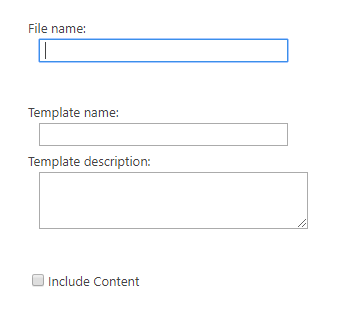
The first part of this process is to create the archive list in SharePoint. This is simple enough, we’re just going to save an empty template of our current list to get all of the settings and columns just right.


Now that we have our destination list, we just need the script. With a few minor changes, we could alter this script to be selective for any date or other criteria captured by our fields. The first part is our establishment of the values for our operations:
# Created by Matt Vignau, Arraya Solutions, Inc. 4-16-2019
Add-PSSnapin Microsoft.SharePoint.PowerShell -erroraction SilentlyContinue
#Configuration variables
$WebURL = “<Insert Site URL here>”
$SourceListName = “<Name of list that needs archiving>”
$TargetListName= “<Name of list to archive content to>”
We need only add the URL of the website that contains our lists and the name of the source list, the one we wish to trim from, and the target list, where we want our items to appear. When we say the “name”, we mean the actual display name of the list that you have chosen for them.
The next part of the code sets up the objects we need to carry out the operation and are fairly straightforward:
#Get Objects
$web = Get-SPWeb $WebURL
$SourceList = $web.Lists[$SourceListName]
$TargetList = $web.Lists[$TargetListName]
$CutOffDate = [datetime](“1/1/19”)
#Get all source items
$SourceColumns = $sourceList.Fields
$SourceItems = $SourceList.GetItems();
Note that you could set the date to be anything you wish to change the created date you want to trim from. After this, we need only set up a loop to go through and make item copies, one column at a time.
#Iterate through each item and add to target list
Foreach($SourceItem in $SourceItems)
{
$CreatedDate = [datetime]($SourceItem[“Created”])
if( $CreatedDate -le $CutOffDate)
{
Write-Host $SourceItem[“ID”]
$TargetItem = $TargetList.AddItem()
Foreach($column in $SourceColumns)
{
if($column.ReadOnlyField -eq $False -and $column.InternalName -ne “Attachments”)
{
$TargetItem[$($column.InternalName)] = $sourceItem[$($column.InternalName)]
}
}
$itemsToDelete += $SourceItem
$TargetItem.Update()
}
}
Finally, we need to clean up the old items with the following loop:
#Movement is complete, move on to delete
Write-Host “Item movement completed, proceeding to delete old items…”
Foreach ($itemToDelete in $itemsToDelete)
{
Write-Host “Now deleting item #” + $itemsToDelete[“ID”]
$itemToDelete.Delete()
}
Write-Host “Items have been deleted”
That’s all there is to it!
Next Steps: Learn more SharePoint tips and tricks
Interested in learning more about how to optimize your SharePoint environment? Reach out to us at https://www.arrayasolutions.com//contact-us/. Also, let us know what you think of this blog by way of social media. Arraya can be found on LinkedIn, Twitter, and Facebook. While you’re there, follow us to stay up to date with our industry insights and unique IT learning opportunities.
