Step-By-Step: SharePoint List Data Management with Power Apps
Microsoft built native integration between Power Apps and SharePoint to make customizing list management experiences extremely easy. In this step-by-step walk through, we’ll dive into just how straightforward of a process it is to manage SharePoint list data with Power Apps.
To get started, let’s create a list:
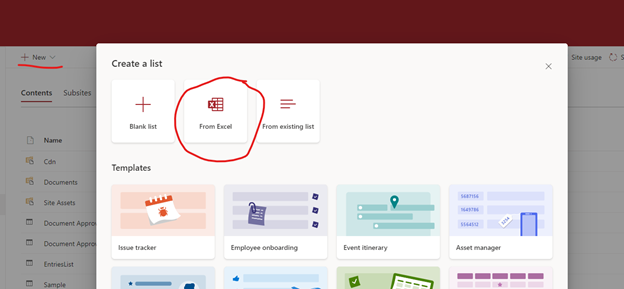
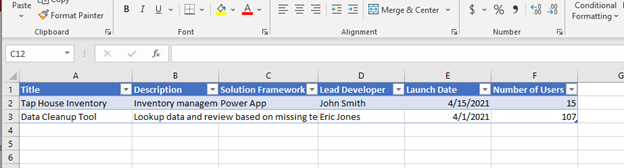
To save time, we will create the columns from a spreadsheet. Note: it must be a table in excel for the uploader to find it in the file.
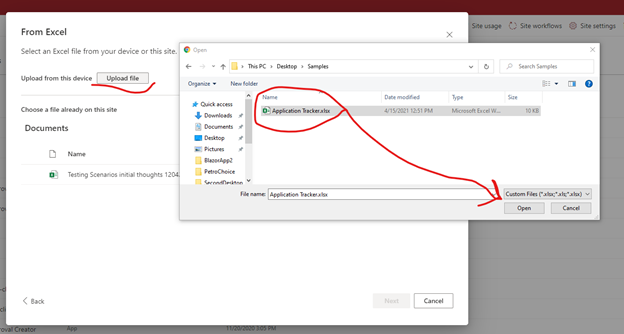
We’ll choose the file and upload to create the list.
We will need to make some adjustments to the types of columns before saving.
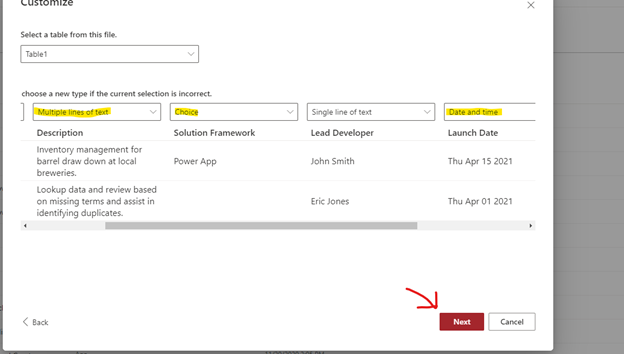
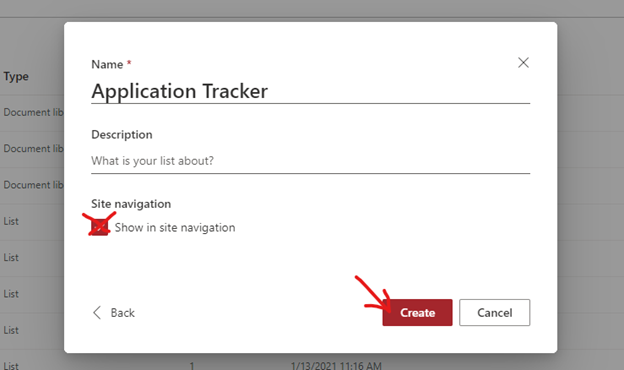
For what we are doing we don’t need the list itself displayed, so we can just adjust the name and hit create.
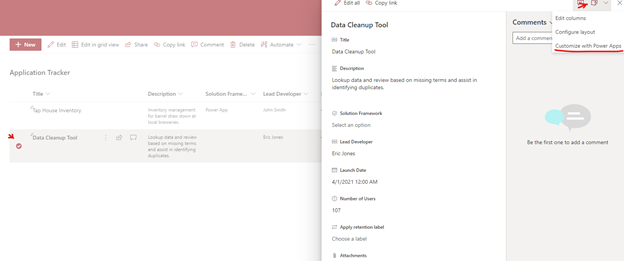
Now that we have our starting list and data, we can customize how we manage it. The default editing experience allows us to manage the data, but for a more tailored approach we can replace it with a power app.
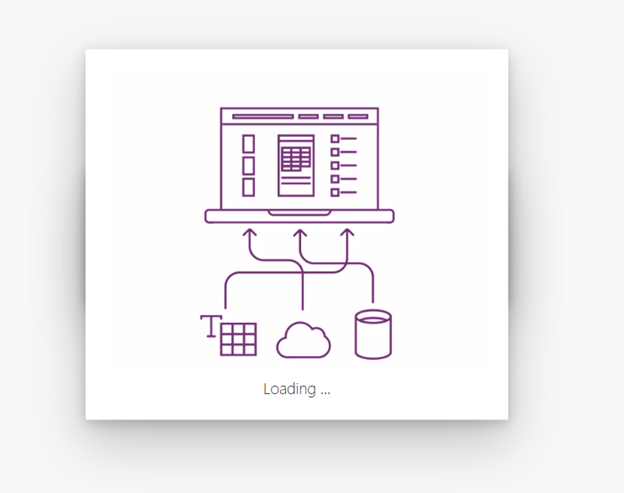
Power apps will spin up a new app tied to the SharePoint list. It may take a couple moments to load.
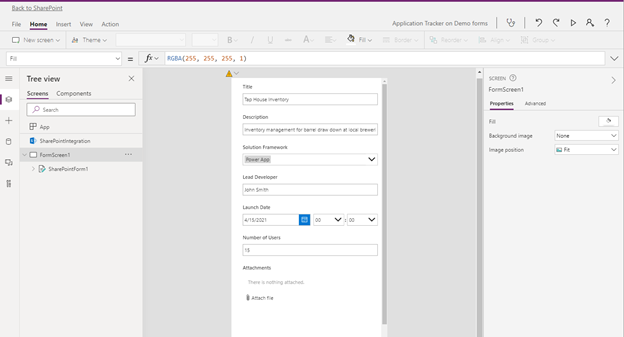
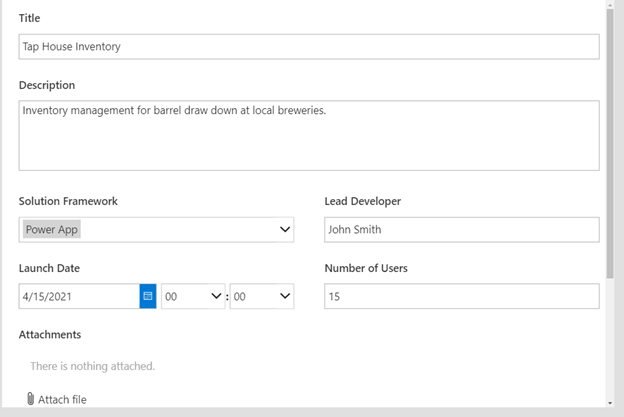
Once the power app loads, the default set of columns based on datatypes are loaded into a form that has a phone layout, like the side flyout of the default editor.
Now that we have a canvas, let’s adjust the layout a bit. Since we know the main users will be on a desktop, let’s use the larger tablet layout. We can change it from the File Menu under settings by choosing landscape orientation.
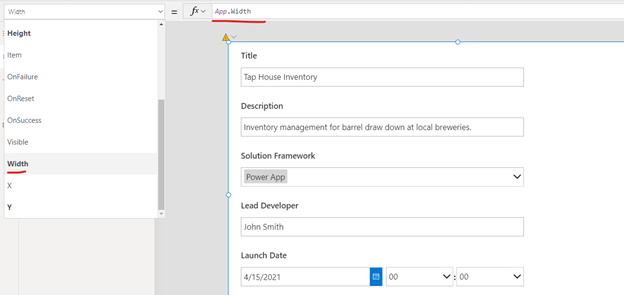
Notice the form itself did not change size. We can adjust that manually or assign the width of the form to be the width of the entire app, so if we change the width again it will automatically match by selecting the form in the tree view and setting the width of the form to the width of the app:
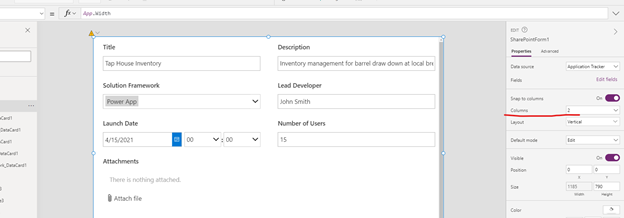
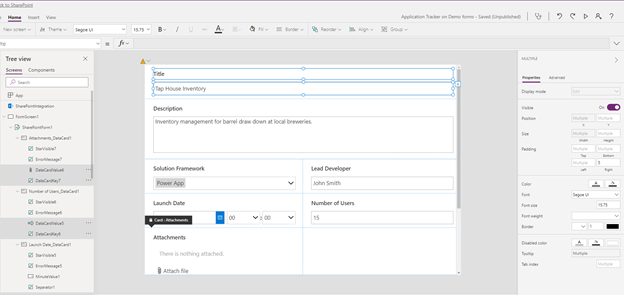
Now that the form itself matches, let’s arrange the data cards inside to use the remainder of the apps open space. The easiest way to do this is by selecting the form from the tree view and then changing the number of columns on the right-hand side:
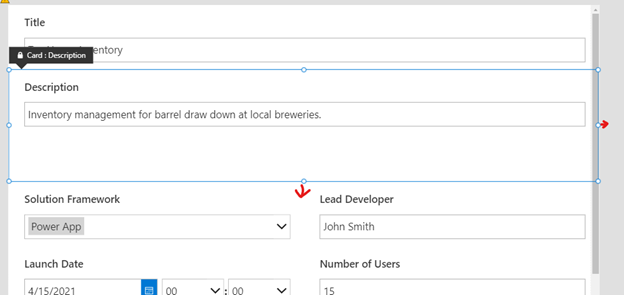
We can resize the individual cards to be larger. It is generally easier to have twice as many columns as you are planning to use when designing, as it allows for more granular rearrangement when you’re working on the layout. Here we’ll just make the title and the description both full width and make the description field taller.
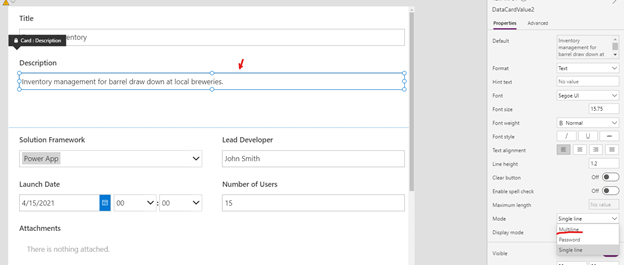
We’ll also change the description field from single line to multi-line, so it flows correctly on the form.
We’re almost done! The detail field looks good, but we still can improve the layout, as it feels a bit spread out.
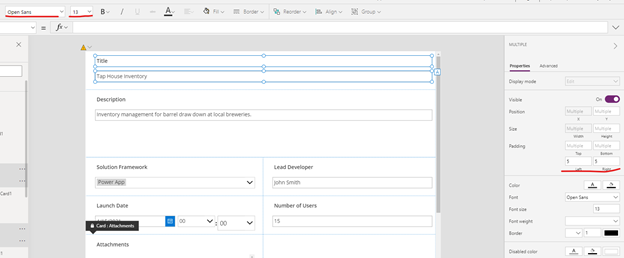
One quick trick is to select the form, change the layout and then click undo. This trick selects all the labels and data fields within the cards together, so you can make unified adjustments to font and padding relative to each card:
We’re going to change the font to Open Sans and decrease the font slightly.
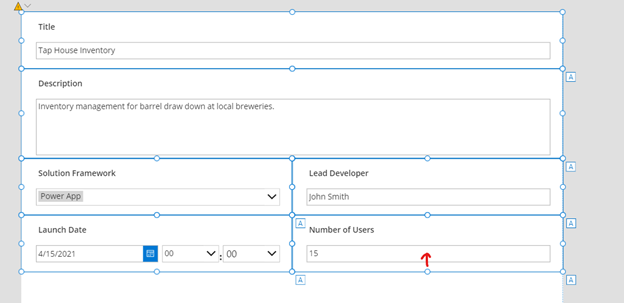
We’ll fix the one outlier field by hand in the launch date card and remove the attachments card, as we don’t really need it. We also need to expand our description field again as it changed height with the rest of the fields. Finally, we Control+Click on each of the data cards themselves to select them as a group and shrink their heights together.
Next, we’ll add some color and a header using a rectangle and a label. You can also use a snippet of static html as well.
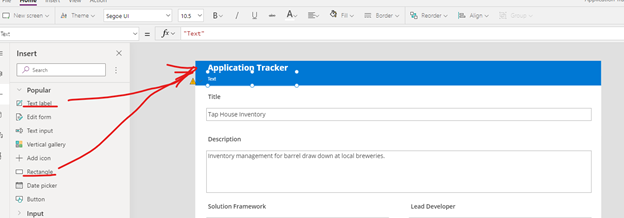
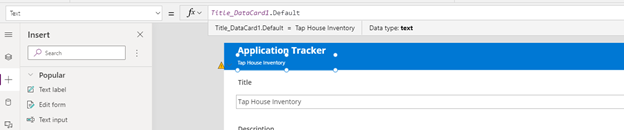
Lastly, we’ll add a subheading that prints the title of the application when we’re editing or says “New Application” when we’re creating a new entry. We do this by first selecting the subheading label and choosing the text property, then typing the name of the data card in the form that is for the title. In our case, Title_DataCard1, and choosing default, which represents the initial value:
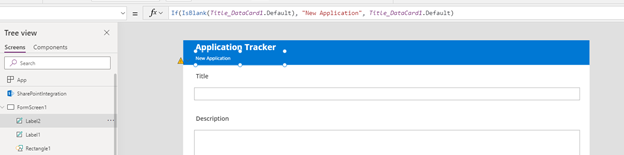
If we look at the form in “New Mode” we’ll see that the subtitle is blank. We actually want it to say “New Application.” To do this we will add a condition to the formula field to check if there is a title. If there isn’t, we’ll show the text for new instead.
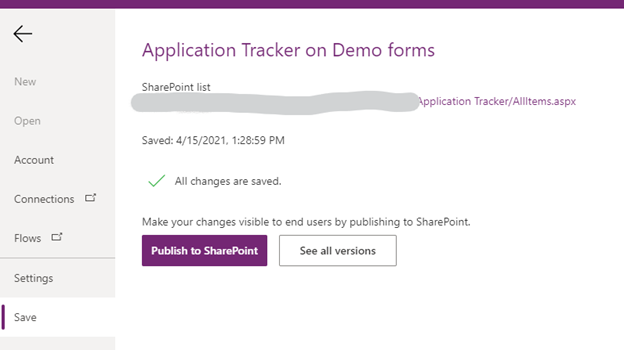
And there we have it! Now we simply publish from File -> Save & Publish and enjoy our new customized form.
Note: you will need to refresh the list twice to see the power app load successfully the first time. After that it should always be there.
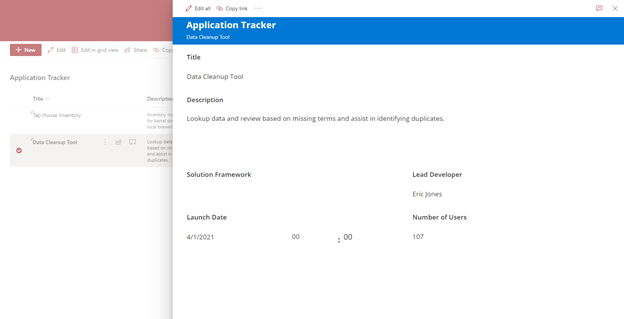
Just like that, we have customized the format and style, as well as organized the content of the list. From here we could add different section breaks with smaller headers, change the lead developer field to use our organization’s users as options, expand the solution framework field to use options coming from another list, or even connect to an excel file and read from there.
The possibilities are nearly endless. Typically, we see this type of customization lead to conversations about integration with existing systems or other applications. Maybe you are looking for a single pane of glass to see the status of an item where the information is located in multiple places. Or perhaps you have just started to investigate ways of seeing your data or visualizing it through other tools like Power BI. Maybe you just need some help structuring your content so you can leverage some of these tools better. Whatever the need, if you have found this content exciting, please let us know. We’d love to talk to you and find out how Arraya can help you with your business.
Want to learn more about Arraya’s Application Development services? Visit https://www.arrayasolutions.com//contact-us/ to open up a dialogue with us today!
Have some thoughts you’d like to share about this post? We want to hear from you! Leave us a comment on this or any of our blog posts through social media. Arraya can be found on LinkedIn, Twitter, and Facebook. While you’re there, follow us to stay updated on our industry insights and unique IT events.